
DIY Crinkle Tag Toy
Over the past several weeks Faye has become increasingly fond of tags. Apparently this is some sort of baby OCD milestone.
In order to fully support her craziness, during her afternoon nap I made her a crinkle tag square to chew/pull/manipulate. The moment her eyes fluttered opened they were met with my creation. I’m happy to report my endeavor was a success. She’s been playing with it non-stop.

DIY CRINKLE TAG TOY
WHAT YOU NEED:

- two 8” squares of soft fabric (I used leftover baby terry loop fabric from Faye’s towels.)
- one 8” square of crinkle material, washed and thoroughly dried (I cut up a foil Snapea Crisp snack bag. Foil bags make the best crinkle sounds.)
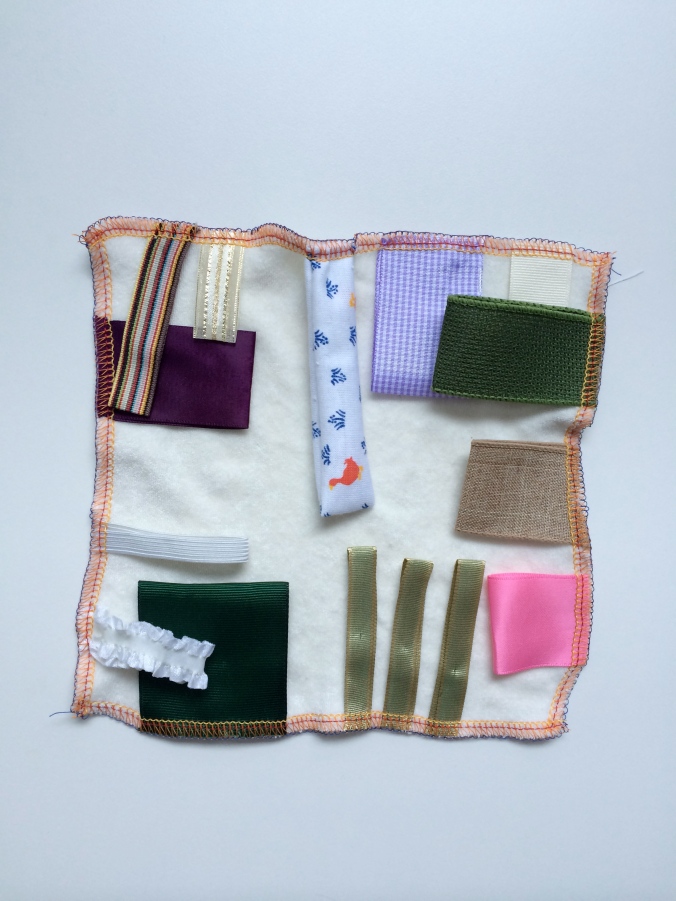
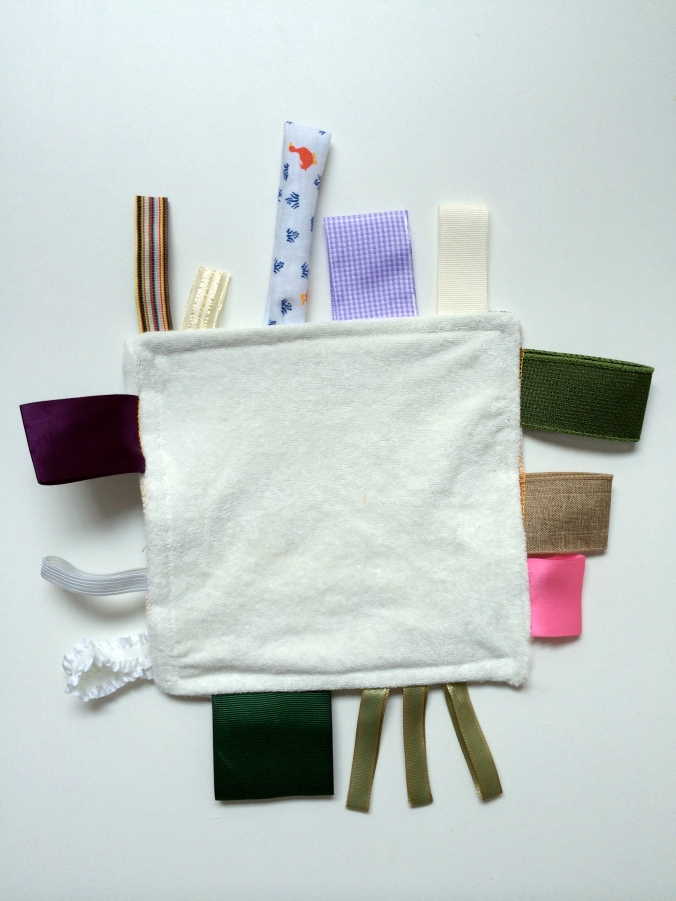
- ribbons of various thicknesses, textures, and colors cut at varying lengths (Make sure to remove the wires if you use any wired ribbons.)
- thread
- scissors
- serger and/or sewing machine
DIRECTIONS
- Fold your ribbons in half and iron so the crease stays down and the ribbon lies flat.
- Pin the crinkle material to the inner face of one square of fabric (the side you don’t want facing out on the toy). Serge or sew around all the sides. Don’t forget to remove the pins.

- Design your toy by laying out the folded and ironed ribbon around the sides of the remaining 8” square of soft fabric, cut sides facing inward.

- After you’ve determined the layout, flip and pin the ribbon so the loops face inward. Serge or sew around all sides. Don’t forget to remove the pins.

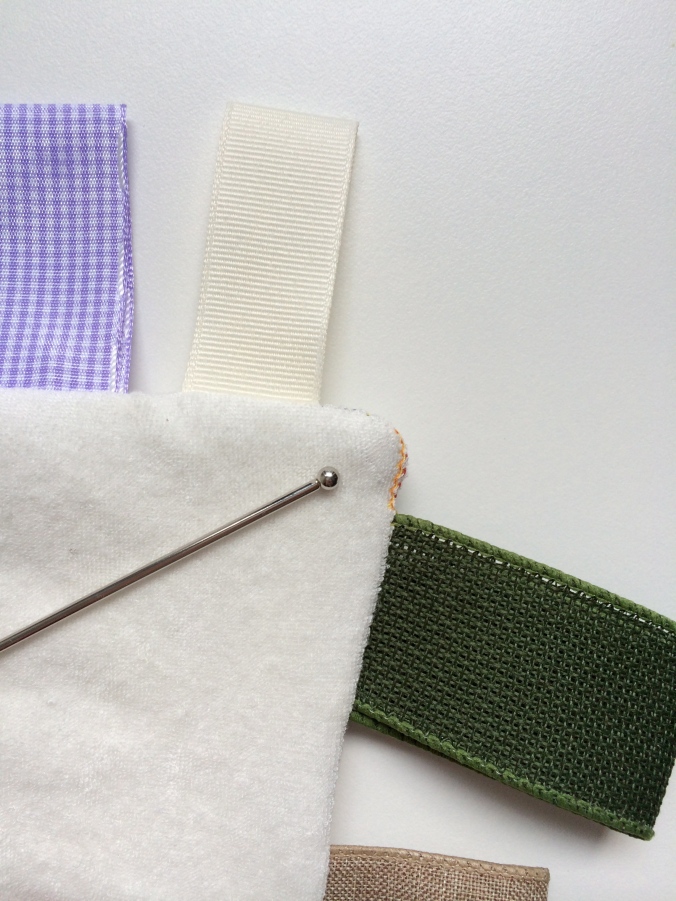
- Line up and lay the 8” square with crinkle material on top of the square with ribbons and pin together. (The crinkle material should be visible; the ribbons should not.) Sew inside of the serge/previous sewing line around 3 ½ of the sides, leaving a gap large enough to turn the entire toy inside out. Remove the pins.

- Pull the toy right side out. Use a bodkin or pencil to push the fabric in the corners and square the edges.

- Fold the remaining edge under and top stitch around the entire square. Check to make sure all pins have been removed.
- Surprise your baby when they wake up and force them to enjoy your hard work.

You will enjoy what mommy made for you or she will start making things for the dog instead.


Could she be any cuter? Love this!Tuesday Sent using CloudMagic
LikeLiked by 1 person