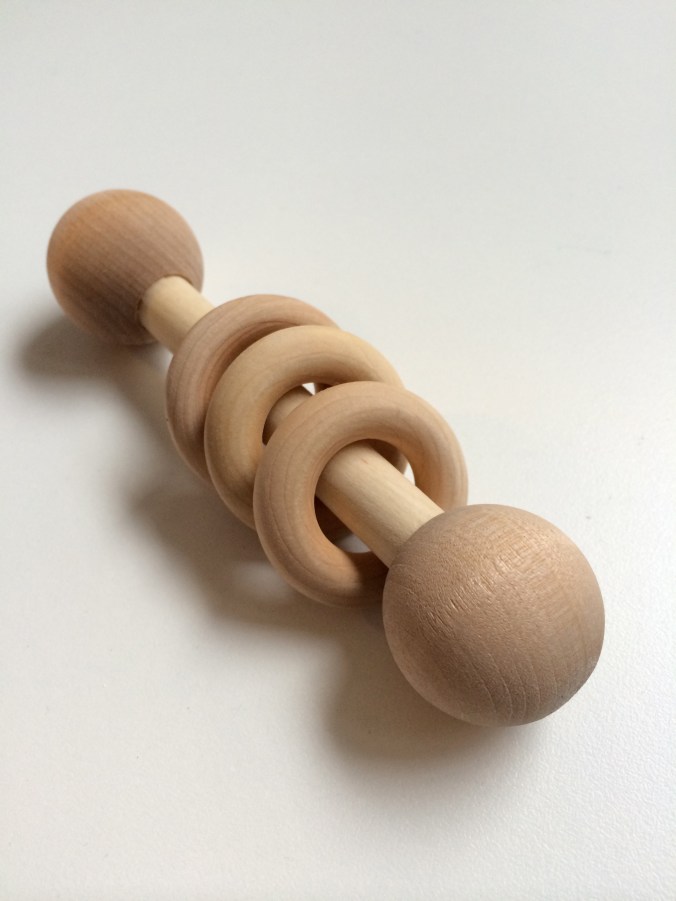
This grasping rattle was the first rattle of the bunch that excited Faye, (and it still does over a month later). It was cut from the same ⅜” dowel as the Bell Rattle and takes even less time and effort to make!
All parts of this rattle are exceptional for building grasping skills and are great for munching. The two larger beads on the end make it easy for her to pass objects back and forth between her left and right hand and allow the rattle to roll across a surface encouraging Faye to move by stretching, rolling, and crawling after it. The past two weeks I’ve noticed that she’s using the rings around the dowel to develop the beginnings of her pincer grasp.
When shaken, the sound is very light and earthy – great for those mornings when you’d like a little more calm or when you’re out and trying to have a conversation over the sounds of a baby.
Assuming you are using the wood glue you purchased and the natural sealant you made for the Bell Rattle, this Grasping Rattle takes under 10 minutes to construct and costs less than $2.00 to make.
WHAT YOU WILL NEED
- ⅜” hardwood dowel ($0.25 each dowel/ $0.08 4″ piece)
- three small wooden rings with an inner diameter smaller than the capping beads. I use ones that have 1 ½” outer diameter and a 3/4″ inner diameter. ($0.25 each/ $0.75 total)
- two 1 ½” beads for capping ($0.475 each/$0.95)
- natural sealant (beeswax & olive oil) (see recipe below)
- non-toxic wood glue like this
- two q-tips
TOOLS
- some type of saw (jeweler’s, circular, table, etc.)
- small piece of extra fine sandpaper
DIRECTIONS
- Using a saw, cut a ⅜” hardwood dowel 4” long.
- Lightly sand the beads, wooden rings, and the length of the dowel with the sand paper. Don’t worry if the ends of the dowel are jacked up. These will be completely covered.
- Wipe all parts clean with a damp paper towel and let dry.
- If you choose to stain your wood with a natural coloring like turmeric or beet root powder, do that now.
- Seal all parts with an all natural sealant taking care to avoid sealing the ends of the dowel and the insides of the bead holes.
- Put some wood glue inside one of the holes of one of the beads (about 1/16 of a tsp). Insert the wooden dowel as far as it will go. (You can even bang it on the table to make sure it gets jammed up there nice and good.) Wipe any glue that oozes out away with a damp q-tip.
- Place the three rings around the dowel.
- Put some wood glue inside the remaining bead. Place this bead on the open dowel end to cap it, pushing as hard as you can/banging on the table, to get the bead to go as far down onto the dowel as possible. Wipe any glue that oozes out away with a damp q-tip.
- Let dry for 24 hours.
- Give to your little one and watch them grow.
All natural sealant
1 part beeswax to 4 parts olive oil or mineral oil (olive oil will go rancid in time, but I prefer it to mineral oil as the rattle will be washed every day and since my child will be chewing on it, I’d rather not give her the runs.)
Over low heat melt 1 part beeswax to 4 parts olive oil, careful that it doesn’t smoke. Stir. Remove from heat, pour into a jar, and let cool stirring occasionally so the oil and beeswax do not separate. Apply sealant to wood in a thin layer with a paper towel or disposable cloth.
Will keep for quite some time in a sealed jar.

